Personal Brand Campaign: Part 1
During my Marketing Automation class this semester at East Carolina University, my classmates and I were tasked with creating a campaign using Act-On. The purpose of this campaign is to display our individual talents and personal brand to a list of 80 professional marketers. Through this post, I will show you exactly how I created mine.
Goal:
Before beginning any successful project, it is essential to set a goal and map out the steps you will need to take in order to reach that objective. In this case, since most of us are graduating, our goal for this project is to land a job and build connections. With that being said, we have to prove our worth and display our skills throughout the campaign before we can achieve our end goal.
Forms:
For this particular campaign, we were instructed to create three separate forms that would produce our three pieces of downloadable content. Our professor told the class that the best way to create these multiple forms is to first build a master form that includes all of the data that we want to collect from our recipients. Once it has been designed exactly how we like, we copy it three times. It’s important to note that all of the forms are to be hooked up to the same form submission list. In this project, I made sure that all of mine were hooked up to the same existing list, “Signups From: ECU FINAL.”

The image located below displays my master form. Within this form, I included all of the information that I plan to receive from my email list. Although this particular one will not be used, I created this one first in order to duplicate my CSS for the ones to follow.
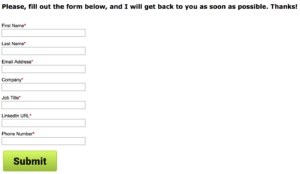
The first of my three forms asks the recipient to enter their first name, last name, email address, and company. Once the individual enters in all of this information, they will be given the first downloadable piece of content and sent a thank you email.
Here is my first form:
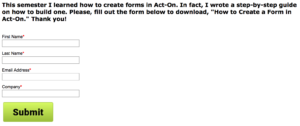
For my second form, I attached my second piece of downloadable content. To receive new information from the reader, I asked for their job title and their LinkedIn URL. With their LinkedIn URL, I can now connect with them.
Here is my second form:
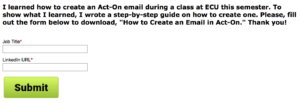
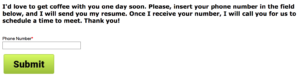
Now that I have all of the basic information that I need from each individual, my third form simply asks for their phone number. This form includes my most valuable piece of content, my resume. If the individual would like to view my resume, I request their phone number in return. After I receive their number, I can contact them and make arrangements to network with one another.
Here is my final form:
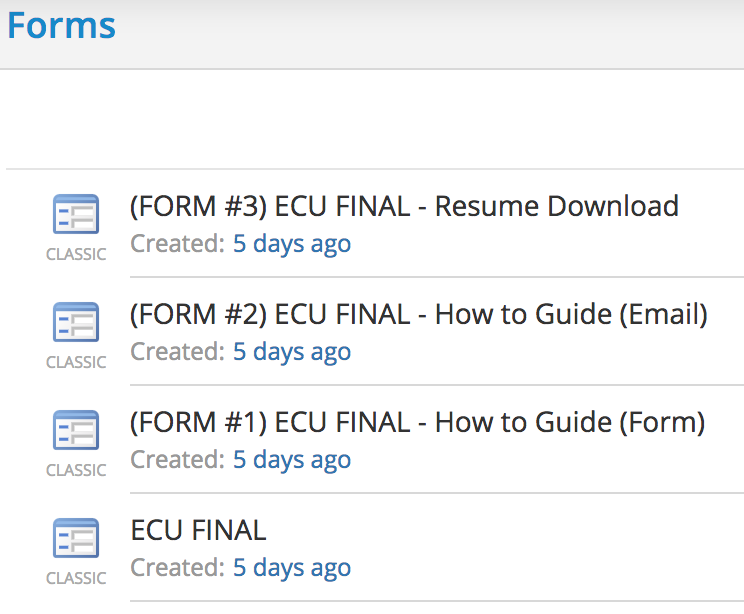
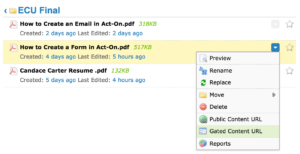
With so many steps required to properly run my personal branding campaign, I specifically named each form so that I can easily keep track and differentiate between them quickly. As you can see by the picture below, the master form is titled, “ECU FINAL” and the other forms are labeled in order from one to three. Also, I clarified in the titles which specific content is attached.

Progressive Profiling Rules:
Now that all of my forms are created, I can create progressive profiling rules. Since I created three forms for my three pieces of content, I needed to have three progressive forms. I labeled each of my progressive forms so that they match the order of my downloadable content. By doing this, I could easily keep track of which is first, second, and third.
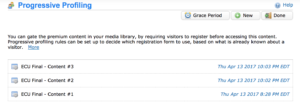
In terms of the rules, I created the same three rules for each of my progressive forms. Although this may seem repetitive, it is essential to remain organized and specific. For each rule, I selected a specific form that I would like to be displayed.
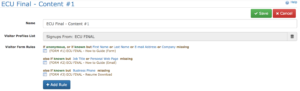
Instead of simply using only the basic forms, we used progressive profiling so that we did not repeatedly ask our contact list for the same information. Instead, the rules catered the form sequence in the correct manner that the contact needed.
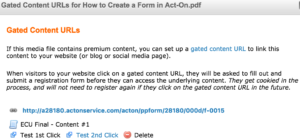
Gated Content URL:
Having completed my progressive profiling, I was then able to generate a gated content URL for each piece of downloadable content. Within my media library on Act-On, I selected on the drop down arrow next to each file. I then clicked on “Gated Content URL” and hit the “Add” button once the pop-up box appeared.
In the drop down box, I selected the set of progressive profiling rules that matched the specific content that I was retrieving the gated content URL for. For example, for my first downloadable piece, I selected the progressive form titled, “ECU Final – Content #1.” After this was selected, a link was displayed available for use.
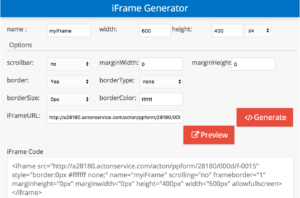
I did all of these steps for each of my three pieces of content. Next, I copied the gated content URL and inserted it into an iframe generator. This is a crucial step because it must be completed for each file in order to include the progressive profiling form and downloadable content within my landing pages.
Stay tuned for part 2 of how I created my personal brand campaign!